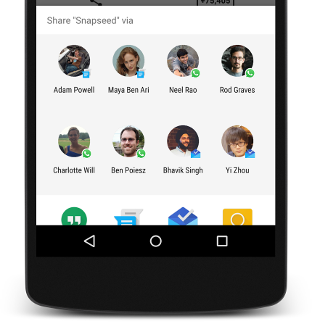
 Let’s say we want to make it easy to share our deadline with friends. To do that, we’d like to have a button at the app bar at the top of the screen that opens the famous Share Menu when tapped. After selecting the app to use for sharing the deadline, that app is opened, ready to share the text:
“I have a deadline in just X hours! Help me procrastinate”
It turns out sharing text between apps in Android is really simple; just tell Android what we intend to do! To do so, we need to use an Intent.
- Go to
MainActivity.kt - Find the code that calculates the number of hours left, and select all of it.
- Press
Ctrl + Alt + Mto refactor it into a method. The created method should not take any parameters, and should return along. Alternative approach, if you want to use fancy property access syntax:- Declare a property
val hoursLeft: Long - On the next line, type
get() { … }, and paste the hour calculation code there. - To use the property, simply type
hoursLeft.
- Declare a property
- Create a new method to handle share button clicks. Inside this method, we create our
Intentand give it to Android:``` public void onShareButtonClicked(MenuItem menuItem) { // We intend to send something Intent intent = new Intent(Intent.ACTION_SEND); // Here’s what we are trying to send intent.putExtra(Intent.EXTRA_TEXT, put the text to share here); // Just plain old boring text. intent.setType(“text/plain”); // Creates the panel that lets us choose app to share via Intent chooserIntent = Intent.createChooser(intent, “Share your deadline using…”); // Display the sharing panel startActivity(chooserIntent); }
We can’t use this method just yet – we need something to click on first! Let’s make our share action icon.
- Right-click the
resfolder and select “New” → “Vector asset” - Find and select the share icon.
- Set the name to
ic_action_share(this is just a convention, you can give it whatever name you want). - Set the color to white.
- Click Next, then Finish.
Congratulations, you just created a vector icon that will look super-crisp on any device! Now include it in a menu:
- Right-click the
resfolder and select “New” → “Android resource file” - Name the file
main_menuand from the “Resource type” dropdown, select “Menu”. - Click OK to create the menu.
- Drag a “Menu item” into the menu.
- Set the ID of the item to
action_share - Title should be “Share”
- Icon should be the one we just created
- For
showAsActionselect “always” - For
onClickselect our methodonShareButtonClicked. Note: you might have to click “View all attributes” at the bottom to see this one.
- Set the ID of the item to
If you run the app now, you might notice that there’s still no share button. That’s because we haven’t told Android to display our menu:
- In
MainActivity, override the methodonCreateOptionsMenu. The easiest way to do this is to just start typing the method name and accepting the suggestion. - Use
menuInflater.inflate()to readmain_menu.xmlinto theMenuobject, and return true to tell Android that we want to display it. Hint: The integer argument is supposed to be a resource ID. You might have noticed that we usedR.layout.activity_mainwhen referencing our layout at the top ofonCreate? That was actually an integer referencing our layout. Where do you think we might find our menu?
Now run the app and try sharing the deadline with your friends!
Note: In early versions of Android, there was no such thing as an app bar. There was a title at the top, period. The stuff we have in the app bar today used to be in a menu that was displayed when the user pressed a physical menu button.
Next: Icons and strings